Table of Contents
Introduction — Why Proper Deployment Matters
Deploying technology in a classroom is not simply about purchasing the latest devices. Successful Smart Classroom Hardware Deployment requires a systematic approach that considers the functional integration of AV systems, control mechanisms, and infrastructure. A poorly executed smart classroom hardware deployment can lead to underutilized devices, frequent technical issues, and frustrated educators, ultimately reducing the return on investment.

In our previous articles, “What Is a Smart Classroom? A Practical Explanation” and “Smart Classroom Components: Complete Guide to AV, Control & Infrastructure Systems”, we outlined the conceptual framework and hardware layers of a smart classroom. Building on that foundation, this article focuses on how to deploy these components effectively, from understanding classroom requirements to post-installation testing. The emphasis here is on engineering principles rather than individual product recommendations.
A typical failure scenario arises when schools buy high-end interactive displays, projectors, or microphones without understanding how these devices interconnect within the classroom system. Without a structured deployment plan, AV signals may degrade, devices may conflict, and hybrid learning capabilities may be compromised.
Smart Classroom Hardware Deployment is fundamentally about translating functional requirements into a reliable, scalable, and future-proof system. To achieve this, deployment must follow a layered approach:
- Assessing functional requirements – understand what the classroom needs, both for standard teaching and specialized scenarios.
- Planning the installation – pre-deployment survey, electrical and network preparation, and layout optimization.
- Executing hardware installation – AV devices, control systems, and infrastructure backbone integration.
- Testing and optimization – ensure that the classroom operates seamlessly for teachers, students, and hybrid participants.
- Training and maintenance planning – prepare staff for effective use and long-term sustainability.
By approaching deployment with this structured mindset, schools and institutions ensure that all hardware and software components function cohesively, maximizing the benefits of a smart classroom ecosystem.
In the following sections, we will cover the full engineering perspective: starting with classroom requirement analysis, through step-by-step deployment workflows, common challenges, and solutions. Every stage will highlight critical considerations for AV performance, control efficiency, and infrastructure stability, providing a practical guide for professional deployment teams.
1. Understanding Classroom Requirements

Before any hardware is installed, the first and most critical step in Smart Classroom Hardware Deployment is understanding the specific requirements of the classroom. A structured needs analysis ensures that each device is correctly selected, positioned, and integrated. These requirements can be divided into ordinary (standard) needs and specialized needs, depending on the classroom type, pedagogical methods, and hybrid learning integration.
1.1 Standard Classroom Requirements
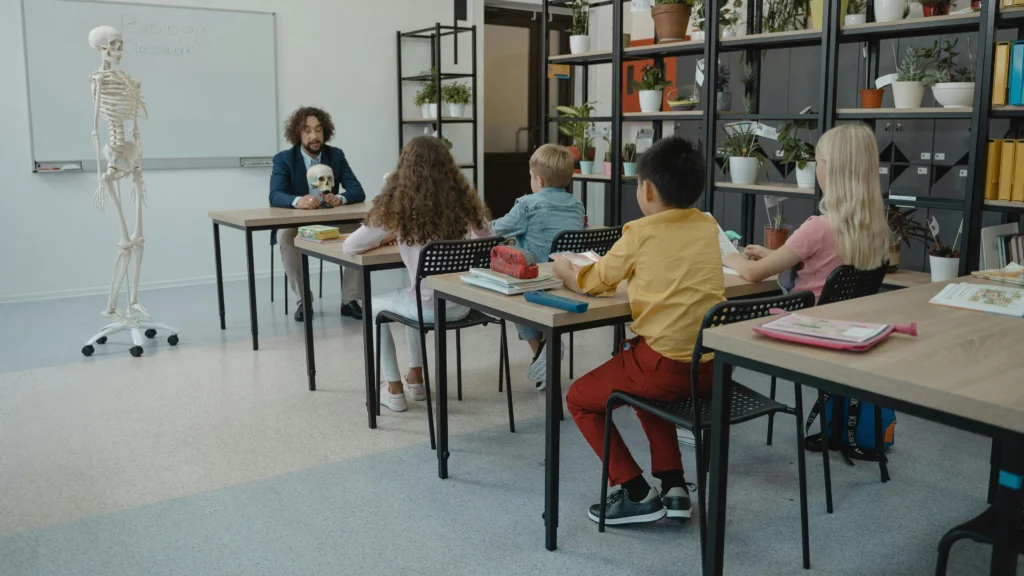
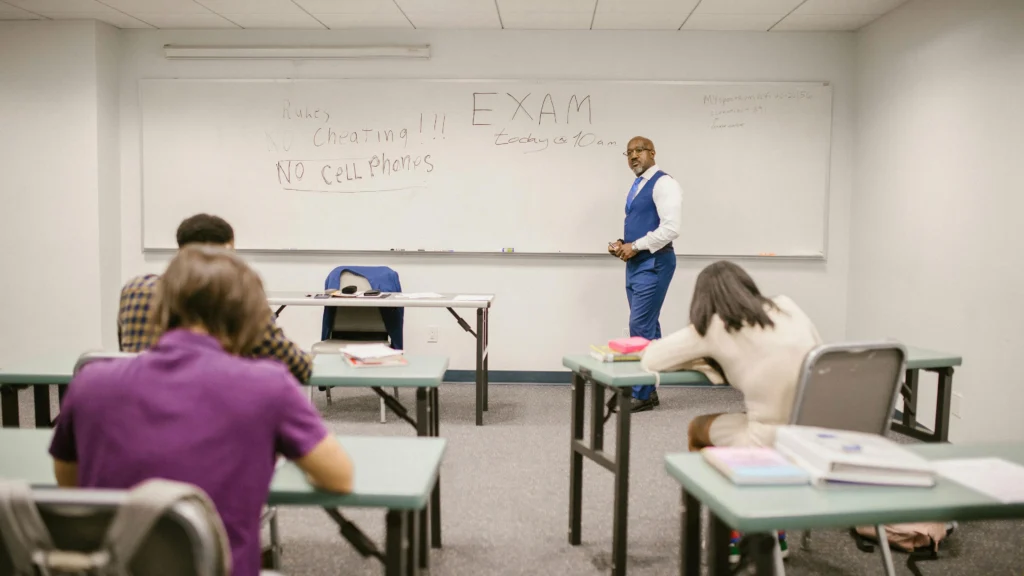
Standard classrooms are designed for general teaching activities and often have typical configurations: 20–50 students, one instructor, and a combination of digital and analog instructional methods.
1.1.1 Visual Requirements (Video & Display)
- Display Type and Size: Select between interactive displays, projectors, or LED walls depending on room size and seating arrangement. Ensure optimal viewing angles for all students.
- Resolution and Brightness: Ensure displays can render content legibly under ambient lighting conditions. A projector with insufficient lumens or a low-resolution display can impede learning.
- Integration with Lecture Capture: Even standard classrooms benefit from basic recording tools to support asynchronous learning.
1.1.2 Audio Requirements (Sound Reinforcement)
- Microphone Selection: Ceiling, lapel, or handheld microphones depending on room acoustics and teaching style.
- Speaker Placement: Ensures even audio coverage without dead zones or excessive echo.
- Acoustic Considerations: Reflective surfaces, reverberation, and ambient noise need to be measured before installation.
1.1.3 Control & Usability Requirements
- Centralized Operation: Teachers should be able to control all AV devices from a single panel or tablet.
- Lesson Mode Presets: Predefined modes for lectures, group activities, and hybrid sessions reduce setup time.
- Power & Network Access: Each AV device must have stable power and network connectivity for hybrid teaching scenarios.
1.2 Specialized Classroom Requirements
Certain classrooms, such as STEM labs, auditoriums, art studios, or hybrid-enabled rooms, have additional or unique deployment considerations.
1.2.1 Hybrid Learning & Lecture Capture
- Camera Coverage: Multi-camera setups for capturing lectures from multiple angles.
- Streaming Quality: Network bandwidth and QoS must support high-definition live streaming.
- Recording & Archiving: Systems for storing lectures and providing student access.
1.2.2 Accessibility & Interactive Engagement
- Assistive Devices: For students with disabilities, consider screen readers, captioning systems, or adjustable podiums.
- Interactive Tools: Document cameras, touch displays, and annotation tools to enhance student participation.
1.2.3 Specialized Equipment
- Science Labs: Integration with sensors, microscopes, or demonstration equipment.
- Auditoriums: Large LED walls, line-array speakers, and high-lumen projectors for visibility and sound clarity.
- AI-Enhanced Components: Future-ready classrooms may require AI-assisted cameras, automated lighting, or intelligent control systems.
1.3 Mapping Functional Needs to Hardware Components
Once requirements are identified, the next step is mapping them to the correct hardware for Smart Classroom Hardware Deployment:
| Requirement Category | Example Components | Deployment Considerations |
|---|---|---|
| Visual | Interactive displays, projectors, LED walls | Viewing angles, ambient light, resolution |
| Audio | Ceiling/lapel microphones, speakers, amplifiers | Coverage, echo reduction, acoustic treatment |
| Capture | Cameras, lecture capture systems, document cameras | Field of view, bandwidth, recording storage |
| Control | Centralized panels, tablets, software dashboards | Ease of operation, lesson modes, automation |
| Infrastructure | Network switches, cabling, power distribution | QoS, redundancy, surge protection |
| Special Requirements | Assistive tech, AI control, specialized lab equipment | Compliance, integration, future-proofing |
By systematically analyzing classroom needs, engineers and deployment teams ensure that every component serves its intended purpose, avoids redundancy, and integrates seamlessly with other devices.
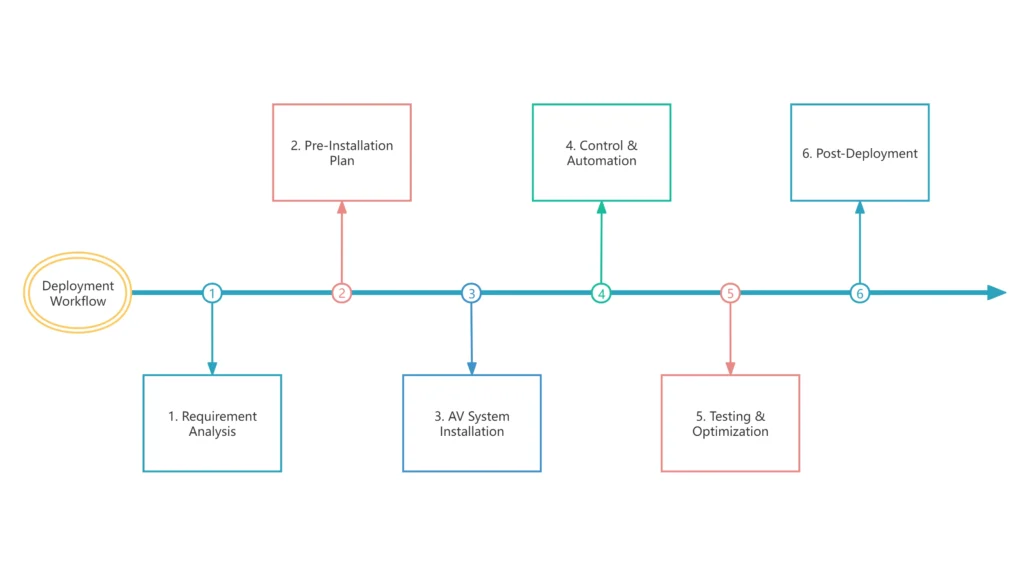
2. Engineering Workflow for Standard Classroom Deployment

After identifying classroom requirements, the next step in Smart Classroom Hardware Deployment is a structured engineering workflow. This workflow ensures that the hardware is deployed efficiently, meets functional needs, and minimizes post-installation issues. The workflow can be divided into pre-installation planning, AV system installation, control system integration, and testing & optimization.
2.1 Pre-Installation Planning
Proper planning sets the foundation for successful Smart Classroom Hardware Deployment. This stage involves site surveys, stakeholder alignment, and detailed design.
2.1.1 Site Survey
- Room Dimensions & Layout: Measure classroom size, ceiling height, and seating arrangement to determine display and speaker placement.
- Ambient Conditions: Assess lighting, natural sunlight, and noise sources to inform display brightness, projector lumens, and acoustic treatment.
- Electrical & Network Infrastructure: Identify existing power outlets, network ports, and cabling pathways to reduce retrofitting challenges.
2.1.2 Requirement Confirmation
- Functional Checklist: Confirm visual, audio, capture, and control requirements identified in Part 1.
- Special Needs Verification: Determine if hybrid learning, assistive technology, or specialized lab equipment is needed.
- Stakeholder Input: Teachers, IT staff, and administrators provide feedback to ensure real-world usability.
2.1.3 Hardware Selection & Procurement
- Component Mapping: Match functional needs with hardware (displays, microphones, speakers, cameras, control panels).
- Vendor Selection: Consider interoperability, warranty, and support when selecting brands and models.
- Budget Alignment: Ensure deployment aligns with cost constraints while meeting minimum functional standards.
2.2 AV System Installation
Once planning is complete, the AV layer—the visual, audio, and capture systems—can be physically deployed.
2.2.1 Visual Installation
- Interactive Displays: Mount panels at optimal height; ensure wall strength and secure brackets.
- Projectors & Screens: Verify throw distance, keystone correction, and alignment with whiteboards or LED walls.
- Cable Management: Install HDMI, VGA, or DisplayPort lines in structured conduits to reduce clutter and protect cables.
2.2.2 Audio Installation
- Microphones: Ceiling, lapel, or desktop mics installed according to room acoustics.
- Speakers & Amplifiers: Position to achieve uniform coverage, minimize echo, and account for reflective surfaces.
- Audio Processing Units: Configure equalization, feedback suppression, and volume zones for optimal clarity.
2.2.3 Capture & Hybrid Equipment
- Cameras & Multi-Angle Capture: Position cameras for teacher, audience, and presentation coverage.
- Lecture Capture Systems: Integrate with displays and audio inputs to enable recording and live streaming.
- Document Cameras & Podiums: Connect to display outputs and AV switchers for seamless source selection.
2.3 Control System Integration
The control layer ensures usability and operational efficiency for teachers.
2.3.1 Centralized Panels
- Install control consoles or tablets in accessible locations.
- Configure control presets for different lesson types (lecture, lab, hybrid session).
2.3.2 Automation & Scheduling
- Program devices to power on/off at predefined times.
- Integrate lighting and projection presets with lesson modes.
2.3.3 Remote Monitoring
- Set up networked dashboards for IT staff to monitor AV device health.
- Ensure alerts for failures, connectivity issues, or device maintenance.
2.4 Testing & Optimization
Before handing over, all systems should be validated and fine-tuned.
2.4.1 Functional Testing
- Confirm all displays, projectors, microphones, speakers, and cameras operate as expected.
- Verify lecture capture and streaming functionality.
- Test central control panels for responsive operation.
2.4.2 Acoustic & Visual Optimization
- Measure sound levels, echo, and coverage. Adjust speaker placement or equalization.
- Calibrate displays and projectors for brightness, contrast, and resolution.
2.4.3 Documentation & Training
- Provide teachers and IT staff with operational manuals, system diagrams, and troubleshooting guides.
- Conduct training sessions for smooth day-to-day operation.
2.5 Summary of Engineering Workflow
By following this structured workflow, Smart Classroom Hardware Deployment achieves:
- Alignment between classroom needs and hardware selection
- Efficient installation minimizing post-deployment issues
- Seamless operation through centralized control and automation
- Optimized AV performance for clear, engaging instruction
This workflow is foundational for both standard classrooms and more complex hybrid or specialized learning spaces. Once completed, the deployed classroom is ready for pedagogical use and scalable future upgrades.
3. Addressing Common Deployment Challenges
Even with careful planning, Smart Classroom Hardware Deployment can encounter challenges. Understanding these common issues early helps prevent delays, cost overruns, and usability problems. We categorize challenges into functional, environmental, operational, and technical and provide practical guidance for each.
3.1 Functional Challenges: Aligning Hardware with Classroom Needs
3.1.1 Misaligned AV Equipment
Problem: Interactive displays, projectors, or audio systems that do not match the classroom size, layout, or teaching style.
Cause: Decisions based solely on product specs or cost, without assessing real functional needs.
Solution:
- Conduct a functional assessment during pre-installation planning.
- Use diagrams to map display visibility, speaker coverage, and camera angles.
- Prioritize AV components that support intended teaching methods and hybrid learning.
3.1.2 Overlooking Special Requirements
Problem: Specialized needs such as assistive technology, STEM labs, or multi-camera setups are not considered.
Cause: Standard deployment templates ignore unique classroom scenarios.
Solution:
- Identify unique teaching workflows (science demos, arts, or language labs).
- Integrate flexible hardware (document cameras, multiple microphones, portable displays).
- Plan extra power and cabling to accommodate potential future devices.
3.2 Environmental Challenges: Room Conditions and Physical Constraints
3.2.1 Lighting and Glare Issues
Problem: Poor visibility on displays or projected images due to sunlight or ceiling lighting.
Solution:
- Choose display brightness or projector lumens matched to ambient light.
- Use blinds, anti-glare screens, or LED walls for high-ambient-light rooms.
3.2.2 Acoustic Problems
Problem: Echo, dead zones, or uneven audio coverage affecting lecture clarity.
Solution:
- Conduct acoustic surveys before installation.
- Install ceiling microphones and distributed speakers strategically.
- Apply audio processing (equalization, feedback suppression).
3.2.3 Space Limitations
Problem: Tight classrooms make installation of large displays, projectors, or podiums difficult.
Solution:
- Consider ultra-short throw projectors or compact interactive displays.
- Modular furniture and adjustable podiums allow flexible arrangement.
3.3 Operational Challenges: Teacher and Staff Usability
3.3.1 Complex Controls
Problem: Teachers struggle to operate multiple devices.
Solution:
- Implement centralized control panels or mobile apps.
- Predefine lesson modes for common activities (lecture, lab, hybrid session).
3.3.2 Lack of Training
Problem: Even perfectly installed systems fail to be effective if staff cannot use them confidently.
Solution:
- Conduct hands-on training sessions with teachers and support staff.
- Provide quick-reference guides for routine operations.
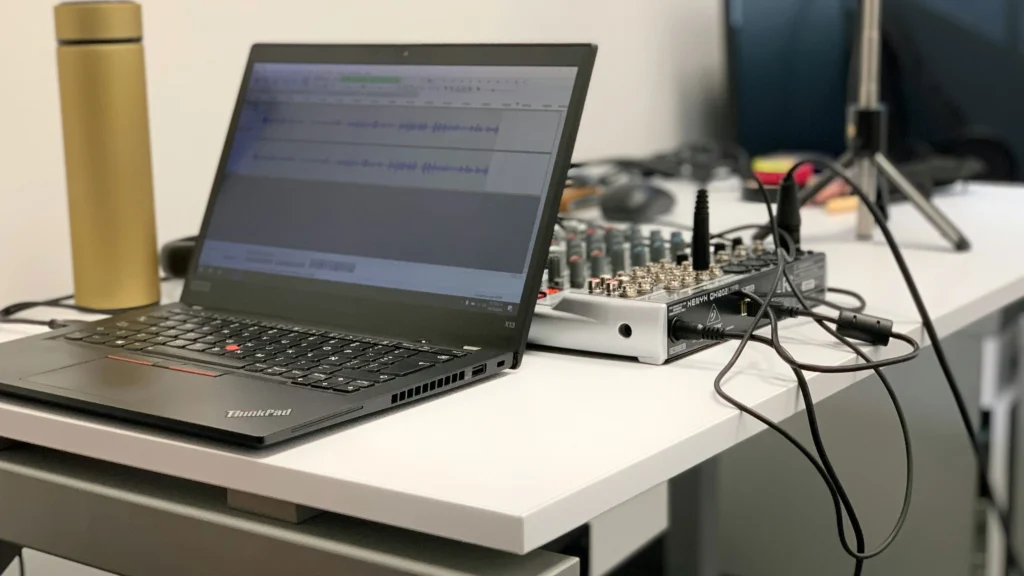
3.4 Technical Challenges: Network, Power, and Integration
3.4.1 Network Instability
Problem: Dropped connections, low bandwidth, or poor Wi-Fi coverage disrupt hybrid sessions.
Solution:
- Use wired connections for critical AV devices.
- Implement VLANs and QoS to prioritize AV traffic.
- Plan Wi-Fi access points for full coverage.
3.4.2 Power and Cabling Issues
Problem: Insufficient outlets, tangled cables, or lack of surge protection.
Solution:
- Install structured cabling and centralized power distribution.
- Use cable management systems and label all lines.
- Incorporate surge protection and redundant power where possible.
3.4.3 Device Interoperability
Problem: Components from different vendors fail to integrate smoothly.
Solution:
- Select hardware that supports standard protocols (HDMI, USB, network AV).
- Test interoperability during pilot deployment.
- Consider professional AV integration services for complex setups.
3.5 Summary of Deployment Challenges
By addressing functional, environmental, operational, and technical challenges:
- The Smart Classroom Hardware Deployment becomes predictable and reliable.
- Teachers and students experience consistent, engaging lessons.
- Future expansion, hybrid learning, and AI-enabled upgrades are easier to implement.
4. Case Study: Virtual Standard Classroom Deployment

4.1 Classroom Overview
For this case study, we consider a virtual standard classroom designed to accommodate 30 students, with hybrid learning capabilities, and the following features:
- Interactive Display: 75-inch front-mounted touchscreen for lectures and annotations.
- Short-Throw Projector: Ceiling-mounted, aligned with a retractable screen for secondary visual content.
- Audio System: Distributed ceiling speakers and a wireless lapel microphone for the instructor.
- Lecture Capture: One main camera covering the teacher and display, one secondary document camera for student work or materials.
- Control System: Centralized touch panel enabling lesson mode presets, AV control, and network monitoring.
- Network Infrastructure: Wired Ethernet for AV devices, high-performance Wi-Fi for students, VLANs for hybrid session traffic.
This virtual classroom provides a baseline scenario for deploying Smart Classroom Hardware Deployment in a typical educational setting. All subsequent steps illustrate a methodical, engineering-driven deployment workflow.
4.2 Pre-Installation Planning
Objective: Translate the classroom requirements into actionable installation plans.
- Room Survey:
- Measure ceiling height, seating layout, and sightlines.
- Note ambient lighting conditions, reflective surfaces, and noise sources.
- Hardware Mapping:
- Interactive display positioned for clear front-row visibility.
- Projector throw distance calculated to avoid keystone distortion.
- Speaker placement modeled using room acoustic software to ensure even sound coverage.
- Network & Power Assessment:
- Verify existing outlets and Ethernet ports.
- Plan structured cabling paths, surge protection, and backup power locations.
4.3 AV Installation Workflow
Goal: Ensure each device is physically and logically integrated for optimal performance.
4.3.1 Visual System Deployment
- Mount the interactive display at eye level for the instructor, ensuring student sightlines are unobstructed.
- Install short-throw projector with alignment checks using laser-guided tools.
- Conduct preliminary calibration of brightness, contrast, and keystone correction.
4.3.2 Audio System Deployment
- Ceiling speakers installed at pre-calculated points to minimize echo and dead zones.
- Wireless lapel microphone system tested for coverage and feedback suppression.
- Acoustic panels added where reflective surfaces create sound artifacts.
4.3.3 Lecture Capture & Camera Setup
- Main camera positioned center-front, capturing both teacher and display.
- Secondary camera placed on side desk for document capture or group activities.
- AV switcher configured for seamless source transitions between cameras, display, and projector.
4.4 Control & Automation Implementation
Objective: Enable intuitive operation for instructors and efficient management by IT staff.
- Central Control Panel: Configured with lesson presets: Lecture Mode, Group Activity, and Hybrid Session.
- Automation: Lights dim and projector turns on automatically when Hybrid Mode is activated.
- Monitoring: IT dashboard tracks device health, network latency, and AV signal integrity.
4.5 Testing & Optimization
- Functional Verification:
- Test display, projector, and camera outputs simultaneously.
- Confirm audio clarity and even coverage in all seating zones.
- Hybrid Session Simulation:
- Conduct live streaming to multiple endpoints.
- Measure latency, audio-video sync, and network reliability.
- Fine-Tuning:
- Adjust speaker EQ and microphone gain.
- Calibrate display brightness relative to room lighting.
- Label all cables and document device locations.
4.6 Lessons Learned
- Requirement Alignment: A precise needs assessment prevents equipment overbuying and underutilization.
- Modular Design: Allowing space for future AI-assisted cameras, additional microphones, or environmental sensors ensures long-term scalability.
- Training is Key: Even well-deployed AV systems require hands-on teacher training to maximize utility.
- Integration Testing Early: Ensuring device interoperability before final deployment avoids post-installation conflicts.
By following this structured, engineering-based approach, this virtual classroom serves as a reproducible model for Smart Classroom Hardware Deployment, balancing technical rigor with real-world usability.
5. Key Takeaways & Deployment Checklist
5.1 Key Takeaways
- Structured Requirement Analysis is Crucial
Every successful Smart Classroom Hardware Deployment begins with a detailed assessment of classroom needs—both standard and specialized. Understanding visual, audio, capture, and control requirements prevents mismatched hardware and post-installation issues. - Engineering Workflow Ensures Reliability
Following a step-by-step workflow—from pre-installation planning, AV installation, control system integration, to testing—guarantees that each component functions cohesively. This reduces downtime and maximizes ROI. - Environmental & Operational Challenges Must be Anticipated
Factors such as room acoustics, lighting, space constraints, and teacher usability have significant impact on system effectiveness. Early consideration avoids costly retrofits. - Hybrid & Future-Ready Design Matters
Smart classrooms increasingly require hybrid learning capabilities. Planning for cameras, lecture capture, and network bandwidth ensures smooth live streaming. Additionally, leaving space and cabling for AI-enhanced or additional devices future-proofs the deployment. - Documentation and Training are Non-Negotiable
Even the most advanced Smart Classroom Hardware Deployment fails without comprehensive training for instructors and IT staff. Operational manuals, quick-reference guides, and hands-on sessions enhance adoption and reduce frustration.
5.2 Deployment Checklist for Standard Smart Classroom
| Stage | Task | Notes |
|---|---|---|
| Planning | Conduct site survey | Measure room, lighting, acoustics, power, and network |
| Confirm classroom requirements | Standard vs specialized needs, hybrid capabilities | |
| Map requirements to hardware | Displays, projectors, audio, cameras, control systems | |
| Hardware Selection | Choose AV devices | Consider interoperability, warranty, support |
| Select control and automation systems | Centralized panels, software dashboards | |
| Installation | Visual system mounting | Height, sightlines, brightness calibration |
| Audio system setup | Speaker placement, mic testing, acoustic treatment | |
| Lecture capture & cameras | Field of view, streaming setup, recording storage | |
| Network & power integration | Structured cabling, surge protection, redundancy | |
| Control & Automation | Configure central control panel | Lesson presets, device grouping |
| Program automation & scheduling | Auto power, lighting, projection modes | |
| Implement remote monitoring | Device health, alerts, predictive maintenance | |
| Testing & Optimization | Functional testing | All displays, projectors, microphones, cameras |
| Acoustic & visual optimization | EQ, microphone gain, display calibration | |
| User training | Teachers & IT staff hands-on, documentation provided | |
| Post-Deployment | Maintenance plan | AV checklists, software updates, spare parts inventory |
| Review & feedback | Teacher experience, hybrid session performance |
5.3 Final Notes

A Smart Classroom Hardware Deployment executed with engineering rigor transforms a standard classroom into a flexible, future-ready learning space. By systematically analyzing needs, planning installation, addressing environmental and operational challenges, and training staff, schools maximize both pedagogical effectiveness and hardware ROI.
Adopting this methodology also ensures smooth integration with hybrid learning, multi-purpose labs, and eventual technology upgrades, making the deployment sustainable and scalable.