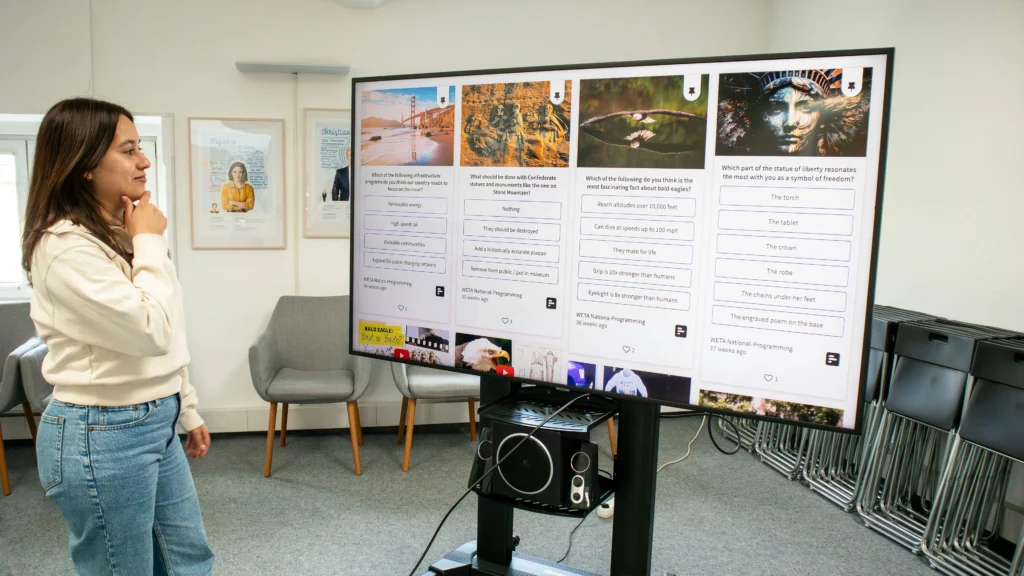
Table of Contents
Clear classroom audio depends on more than equipment quality. In many cases, audio issues stem from simple microphone placement mistakes rather than hardware failure.
Teachers often assume that once a microphone is powered on, it will automatically deliver consistent clarity. However, classroom microphone placement directly affects speech intelligibility, feedback risk, background noise pickup, and overall system stability.
Understanding common microphone placement mistakes helps prevent distorted sound, uneven volume, and disruptive audio feedback.
In modern classrooms—especially hybrid environments—microphone positioning is as critical as speaker design or amplification architecture.
Why Microphone Placement Matters More Than Most People Realize
Microphones do not simply “capture sound.” They capture sound within specific pickup patterns and sensitivity ranges.
Improper teacher microphone position can result in:
- Excessive ambient noise
- Reduced speech clarity
- Gain instability
- Increased feedback risk
When microphone placement mistakes occur, instructors often compensate by increasing volume. This usually worsens the problem rather than solving it.
Proper classroom microphone placement ensures:
- Balanced input levels
- Minimal background interference
- Stable amplification
Audio clarity begins at the source.
Mistake 1: Placing the Microphone Too Far From the Mouth
One of the most common microphone placement mistakes teachers make is wearing a lapel microphone too low on the chest.
Lapel microphones are designed to capture speech within a specific distance range. When positioned too far from the mouth, they require higher gain to compensate.
Higher gain introduces:
- Room noise
- Air conditioning hum
- Student chatter pickup
- Increased feedback potential
Proper lapel microphone placement typically positions the microphone approximately 15–20 cm below the mouth, centered to avoid clothing friction.
Distance consistency is critical. Small adjustments can significantly affect clarity.
Mistake 2: Covering the Microphone With Clothing
Another frequent classroom microphone placement issue occurs when clothing interferes with the microphone capsule.
Scarves, jackets, or loose fabric can:
- Muffle sound
- Create rustling noise
- Distort speech clarity
Even minor fabric contact can degrade signal quality.
Teachers using lapel microphones should ensure the capsule remains unobstructed and stable during movement.
This problem often goes unnoticed because the speaker hears only amplified output—not the friction artifacts perceived by listeners.
Mistake 3: Incorrect Headset Microphone Positioning
Headset microphones provide more stable sound pickup than lapel systems—but only when positioned correctly.
A common mistake is placing the microphone directly in front of the mouth.
While this may seem logical, it increases plosive noise and breath distortion.
Proper headset microphone positioning places the capsule slightly off-center, near the corner of the mouth, approximately two finger-widths away.
This placement reduces popping sounds while maintaining strong signal capture.
When teachers adjust headset position frequently during lessons, audio consistency decreases.
Stable positioning improves intelligibility and reduces system recalibration needs.
Mistake 4: Ignoring Pickup Pattern Direction
Different microphones have different pickup patterns.
Omnidirectional microphones capture sound from all directions.
Cardioid microphones prioritize sound from the front while reducing rear noise.
One of the more subtle microphone placement mistakes involves misunderstanding pickup direction.
For example, a directional microphone worn backward or misaligned with the mouth may capture more ambient room noise than speech.
In classrooms with ceiling speakers or reflective surfaces, improper orientation increases feedback likelihood.
Teachers may not realize that simply rotating the microphone capsule can significantly change audio clarity.
Mistake 5: Poor Ceiling Microphone Placement in Shared Classrooms
As more schools adopt ceiling microphone arrays, microphone placement mistakes shift from individual wearables to architectural positioning.
Ceiling microphones are designed to capture sound across defined pickup zones. However, improper placement can create uneven audio capture and excessive ambient noise.
A common error is installing ceiling microphones directly above projectors or ventilation systems. Mechanical noise from HVAC systems can contaminate the signal before speech even reaches the processing stage.
Another mistake involves placing ceiling microphones too close to classroom speakers. This increases the likelihood of audio re-entry and feedback loops.
Effective ceiling microphone placement requires alignment with:
- Seating distribution
- Speaker locations
- Reflective surfaces
- Hybrid camera framing zones
Ceiling microphones should not be positioned solely for aesthetic symmetry. Acoustic geometry matters more than visual alignment.
Mistake 6: Ignoring Room Acoustics When Positioning Microphones
Microphones respond differently depending on the acoustic environment.
In highly reflective classrooms with tile floors and concrete walls, sound reflections reach the microphone milliseconds after direct speech. When microphone placement mistakes occur in such environments, reverberation is amplified along with voice.
Teachers may interpret this as “echo” or “low clarity,” when the real issue lies in microphone positioning relative to reflective surfaces.
For example, placing a boundary microphone near a wall corner increases low-frequency buildup and room coloration.
Proper classroom microphone placement considers:
- Distance from reflective surfaces
- Height relative to seating
- Direct vs reflected sound path
Sometimes repositioning a microphone by even half a meter significantly improves intelligibility.
Microphone positioning is an acoustic decision—not merely a mounting decision.
Mistake 7: Moving Too Far Outside the Pickup Zone
Instructors often move dynamically during teaching. However, not all microphones are designed for wide movement coverage.
One of the more subtle microphone placement mistakes involves assuming the microphone “follows” the teacher’s voice automatically.
With lapel or headset microphones, body rotation can reduce pickup consistency if the microphone capsule is directional.
With ceiling microphones, walking outside the defined pickup lobe decreases signal strength and increases background noise ratio.
In hybrid classrooms, inconsistent pickup creates volume fluctuations for remote participants—even if in-room amplification sounds acceptable.
Clear audio depends on understanding the microphone’s effective coverage zone.
Teachers should be aware of how movement affects pickup performance.
Mistake 8: Placing Table or Boundary Microphones Incorrectly
Boundary microphones are often used for group discussions or conference-style classrooms.
Improper boundary microphone placement can result in:
- Uneven participant capture
- Table vibration noise
- Dominance of nearby speakers
Placing a boundary microphone too close to a single participant skews volume balance.
Placing it near laptop speakers increases feedback risk during hybrid sessions.
Boundary microphones perform best when centrally positioned relative to discussion participants and isolated from mechanical vibration.
Again, microphone placement mistakes often stem from convenience rather than acoustic reasoning.
Mistake 9: Increasing Gain Instead of Adjusting Placement
When audio sounds weak, the instinct is to increase amplification.
However, increasing gain without correcting microphone placement often worsens clarity.
Higher gain amplifies:
- Background noise
- Reverberation
- Clothing friction
- HVAC hum
Proper correction begins with physical positioning before adjusting electronic settings.
Microphone placement mistakes cannot be corrected solely through amplification or DSP processing.
Hardware cannot compensate for poor source alignment.
This is especially important when coordinating with classroom speakers and amplification systems.
Classroom Speakers & Amplification: What Matters
Amplification stability begins with correct microphone positioning.
Hybrid Classroom Complications

Hybrid learning environments introduce additional placement challenges.
In hybrid setups, microphones serve dual purposes:
- Reinforcing sound within the room
- Transmitting audio to remote participants
A microphone positioned optimally for in-room amplification may not provide sufficient clarity for online listeners.
Similarly, increasing sensitivity for remote clarity may increase feedback locally.
This balancing act means microphone placement mistakes in hybrid classrooms have amplified consequences.
Clear audio routing often requires:
- Separate reinforcement and recording signal paths
- Echo cancellation tuning
- Strategic microphone zoning
Without proper placement strategy, hybrid sessions quickly suffer from echo artifacts and inconsistent volume.
Microphone placement becomes part of overall classroom system architecture rather than a standalone adjustment.
Practical Microphone Placement Guidelines by Type
Avoiding microphone placement mistakes requires understanding how different microphone types behave in classroom environments.
Rather than relying on trial and error, placement should follow acoustic logic.
Lapel Microphones
Lapel microphones are highly sensitive to distance and obstruction.
Effective classroom microphone placement for lapel systems includes:
- Positioning 15–20 cm below the mouth
- Keeping the capsule centered and unobstructed
- Securing cables to prevent movement noise
Consistency is more important than perfection. Frequent repositioning creates inconsistent gain structure and forces repeated system adjustments.
Teachers should also avoid attaching lapel microphones to loose or flexible fabric that shifts during movement.
Headset Microphones
Headset systems provide more stable pickup but require precise alignment.
Proper headset microphone positioning places the capsule slightly to the side of the mouth rather than directly in front.
Distance should remain consistent, typically two finger-widths from the lips.
The goal is clear speech capture without breath interference.
Once adjusted, the headset should remain fixed. Micro-adjustments during lessons often introduce inconsistency.
Ceiling Microphone Arrays
Ceiling systems require placement aligned with seating zones rather than architectural symmetry.
Effective ceiling microphone placement considers:
- Student seating patterns
- Instructor movement zones
- Speaker positions
- Camera framing for hybrid sessions
Ceiling microphones should not sit directly above speakers or mechanical systems.
Spacing and zoning should minimize overlap with amplified output.
When installed correctly, ceiling arrays reduce wearable dependency and maintain consistent pickup without instructor intervention.
Boundary Microphones
Boundary microphones perform best when centrally positioned relative to discussion participants.
They should be:
- Isolated from laptop speakers
- Protected from table vibration
- Positioned away from reflective corners
In collaborative classrooms, adding multiple boundary microphones may produce better balance than increasing gain on a single unit.
Placement strategy always outweighs amplification compensation.
Quick Diagnostic Framework for Teachers
When audio issues occur, teachers often assume equipment malfunction.
Instead of immediately increasing volume, use this diagnostic approach:
First, check distance.
Has the microphone shifted farther from the mouth?
Second, check obstruction.
Is clothing covering the capsule?
Third, check orientation.
Is the microphone facing the correct direction?
Fourth, check environment.
Has classroom layout changed since installation?
This structured approach resolves most microphone placement mistakes without technical recalibration.
Small vs Large Classroom Considerations
Microphone placement mistakes affect classroom sizes differently.
Small Classrooms
In smaller rooms, over-amplification is the primary risk.
Minor placement errors become exaggerated when gain levels are unnecessarily high.
Often, correcting distance and reducing amplification solves clarity issues immediately.
Small classrooms require restraint more than power.
Medium and Large Classrooms
In larger rooms, placement errors produce uneven intelligibility zones.
A microphone positioned slightly off-axis may sound acceptable in the front rows but weak in the back.
Hybrid classrooms magnify these inconsistencies because remote participants hear raw input rather than spatially blended room sound.
In larger environments, placement precision becomes increasingly critical.
System calibration should follow physical positioning—not precede it.
Training and Long-Term Optimization
Even well-designed classroom audio systems degrade in performance when users lack placement awareness.
Institutions investing in classroom speakers and amplification should also provide basic microphone positioning training.
Short instructional sessions covering:
- Proper lapel placement
- Headset alignment
- Movement awareness
- Hybrid audio routing
can dramatically reduce recurring support requests.
Technology stability depends as much on user behavior as on hardware quality.
Microphone placement mistakes are often behavioral, not technical.
Addressing them through training produces long-term system reliability.
Final Perspective: Audio Clarity Begins at the Source

Microphone placement mistakes are among the most common yet preventable classroom audio problems.
While schools frequently focus on upgrading speakers, amplifiers, or DSP systems, clarity begins at the source of capture.
Correct classroom microphone placement:
- Reduces feedback risk
- Improves speech intelligibility
- Stabilizes gain structure
- Enhances hybrid learning quality
Amplification and processing cannot compensate for poor initial positioning.
When microphones are properly placed, classroom audio systems function smoothly, often invisibly.
When placement is neglected, even advanced equipment struggles to deliver consistent clarity.
The simplest adjustments often produce the most significant improvements.